![]()
A step-by-step tutorial to use Biq Blue As A Service
Welcome to the step-by-step guide on how to setup Biq Blue "as a service" for your Google BigQuery account.
How it works?
Biq Blue aggregates information from INFORMATION_SCHEMA views across your projects into tables within your BigQuery account.
This process enables Biq Blue to analyze your usage and make suggestions for improvement.
Biq Blue cannot access the contents of your tables, as it only requires metadata through specific organization-level IAM roles.
These roles are restricted to gathering job, table, storage and other meta information, ensuring Biq Blue never interacts with or views your actual data.
Additionally, Biq Blue requires the creation of a specific dataset where it can read and write its own tables, but these permissions are limited only to this dataset.
Step 1: Create a Service Account
- In your main project, navigate to Google Cloud's service accounts console
- Click on + CREATE SERVICE ACCOUNT to create a new service account
biq-blue, no need to add roles now, neither grant users access to this service account
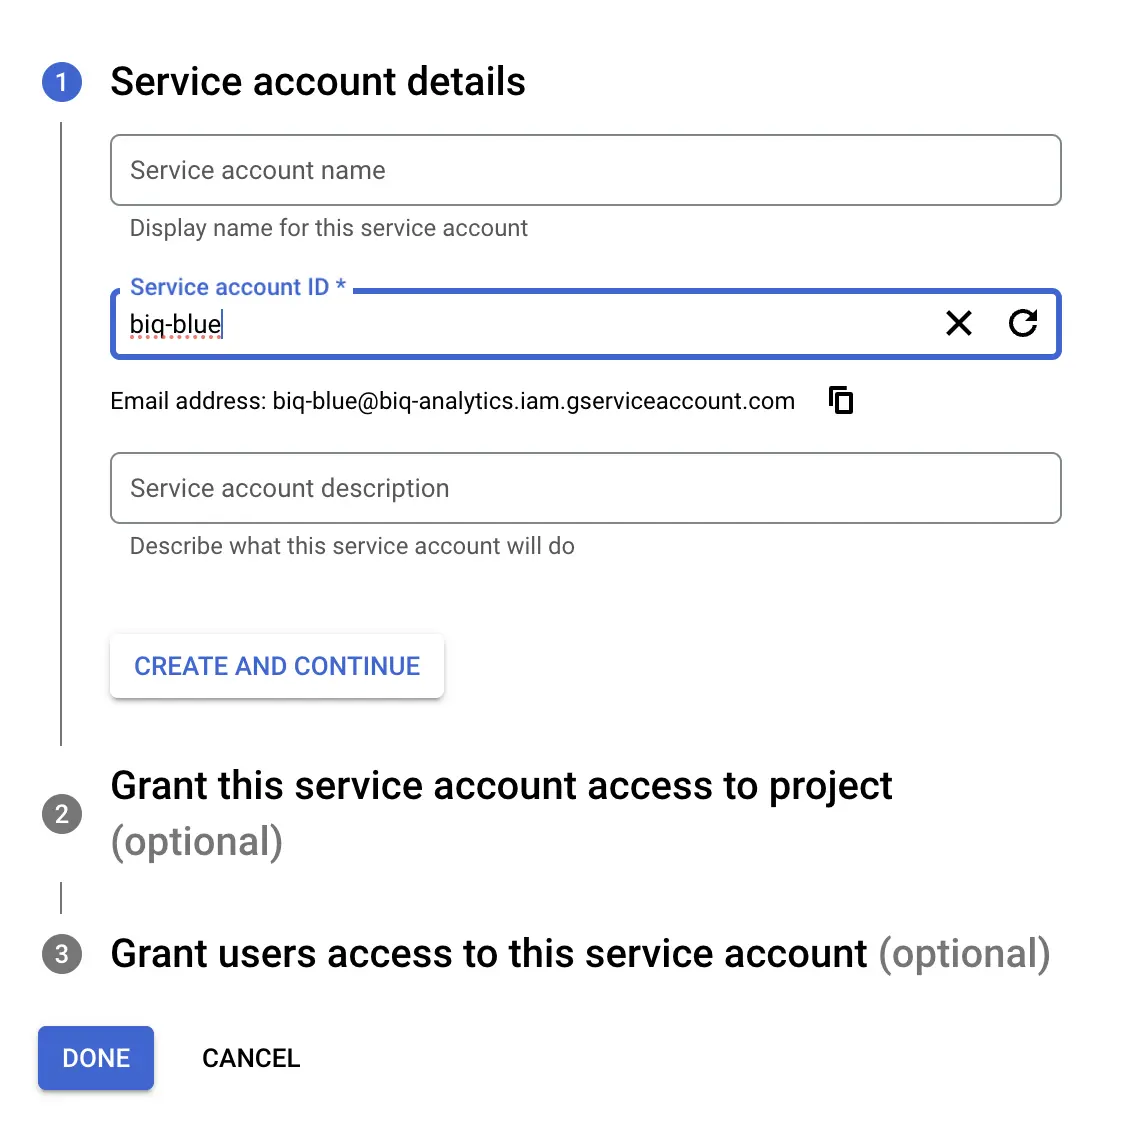
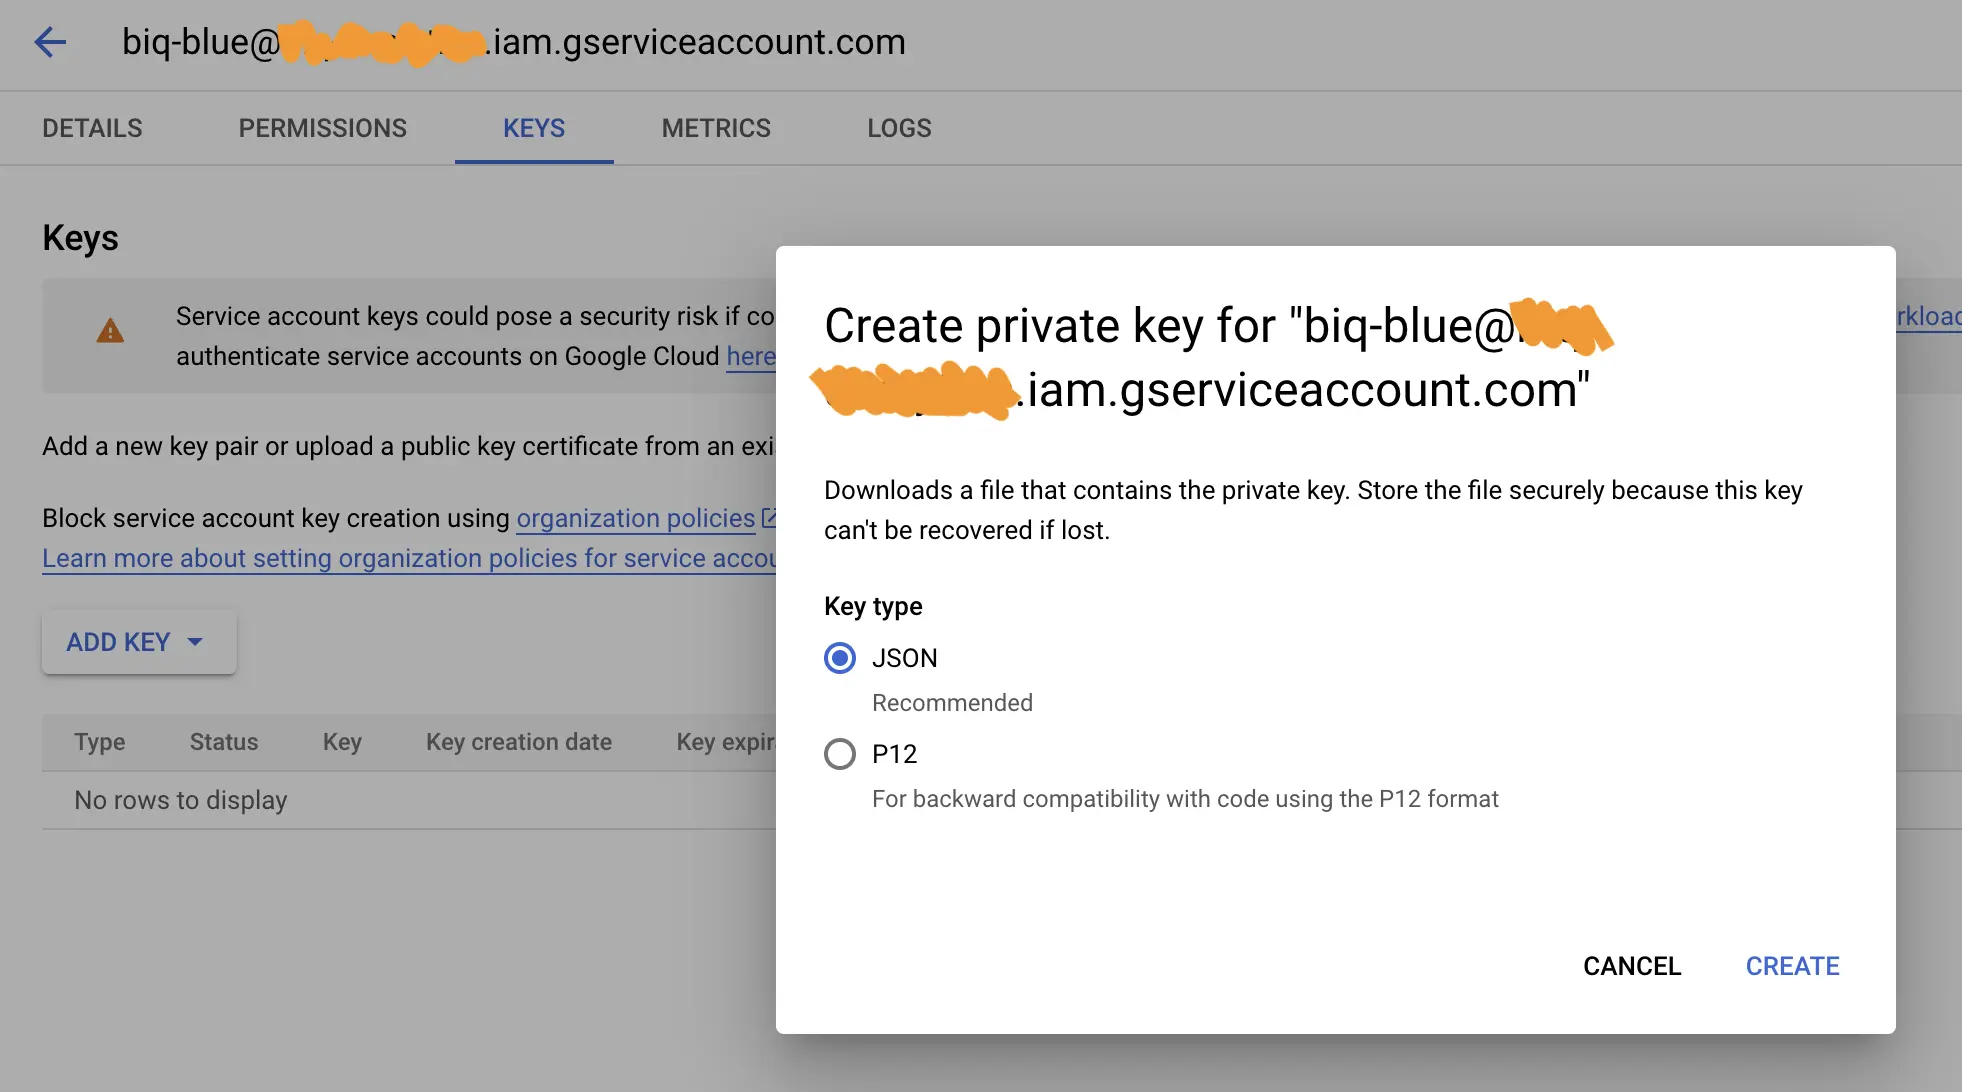
- Click on the new service account, go to "Keys" tab, and "Add Key" in JSON
- Download the JSON
Step 2: Create the biqblue dataset
- In your main project, click on ⋮ > Create dataset and named it
biqbluein the same region you use for your business tables - In the
biqbluedatatset, click on + SHARING > Permisssions > Add Principal and give the service account the following roles: - BigQuery Data Editor (
roles/bigquery.dataEditor)
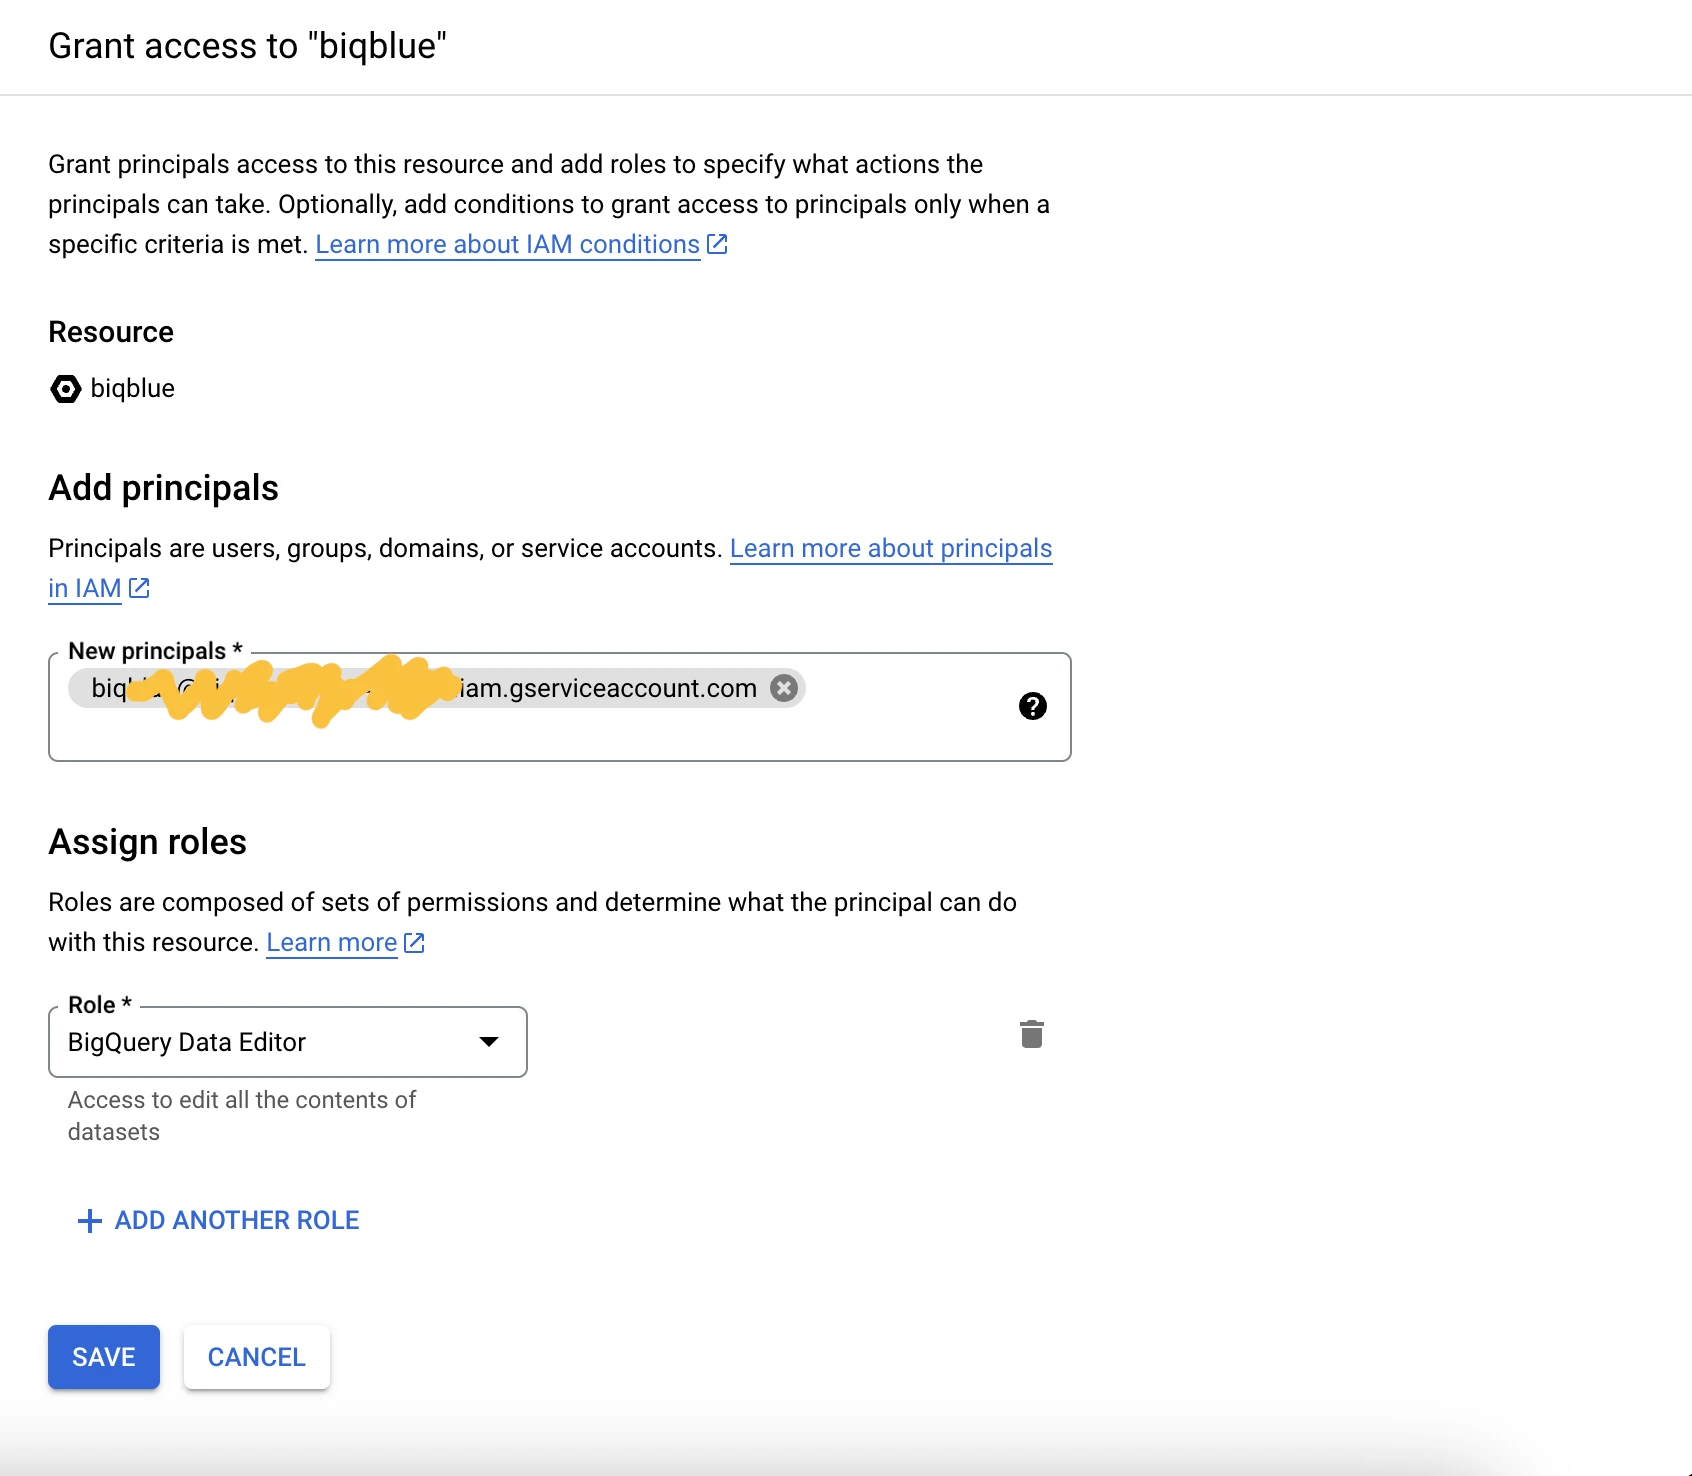
❤️ Biq Blue can now create its tables in this new dataset, and this dataset only.
Step 3: Assign the required roles to your new service account at organization level
- Go to the IAM root section and select your organization (the root folder)

- Click on + GRANT ACCESS and give
biq-blueservice account the following roles: - BigQuery Metadata Viewer (
roles/bigquery.metadataViewer) - BigQuery Resource Viewer (
roles/bigquery.resourceViewer) - BigQuery Job User (
roles/bigquery.jobUser)
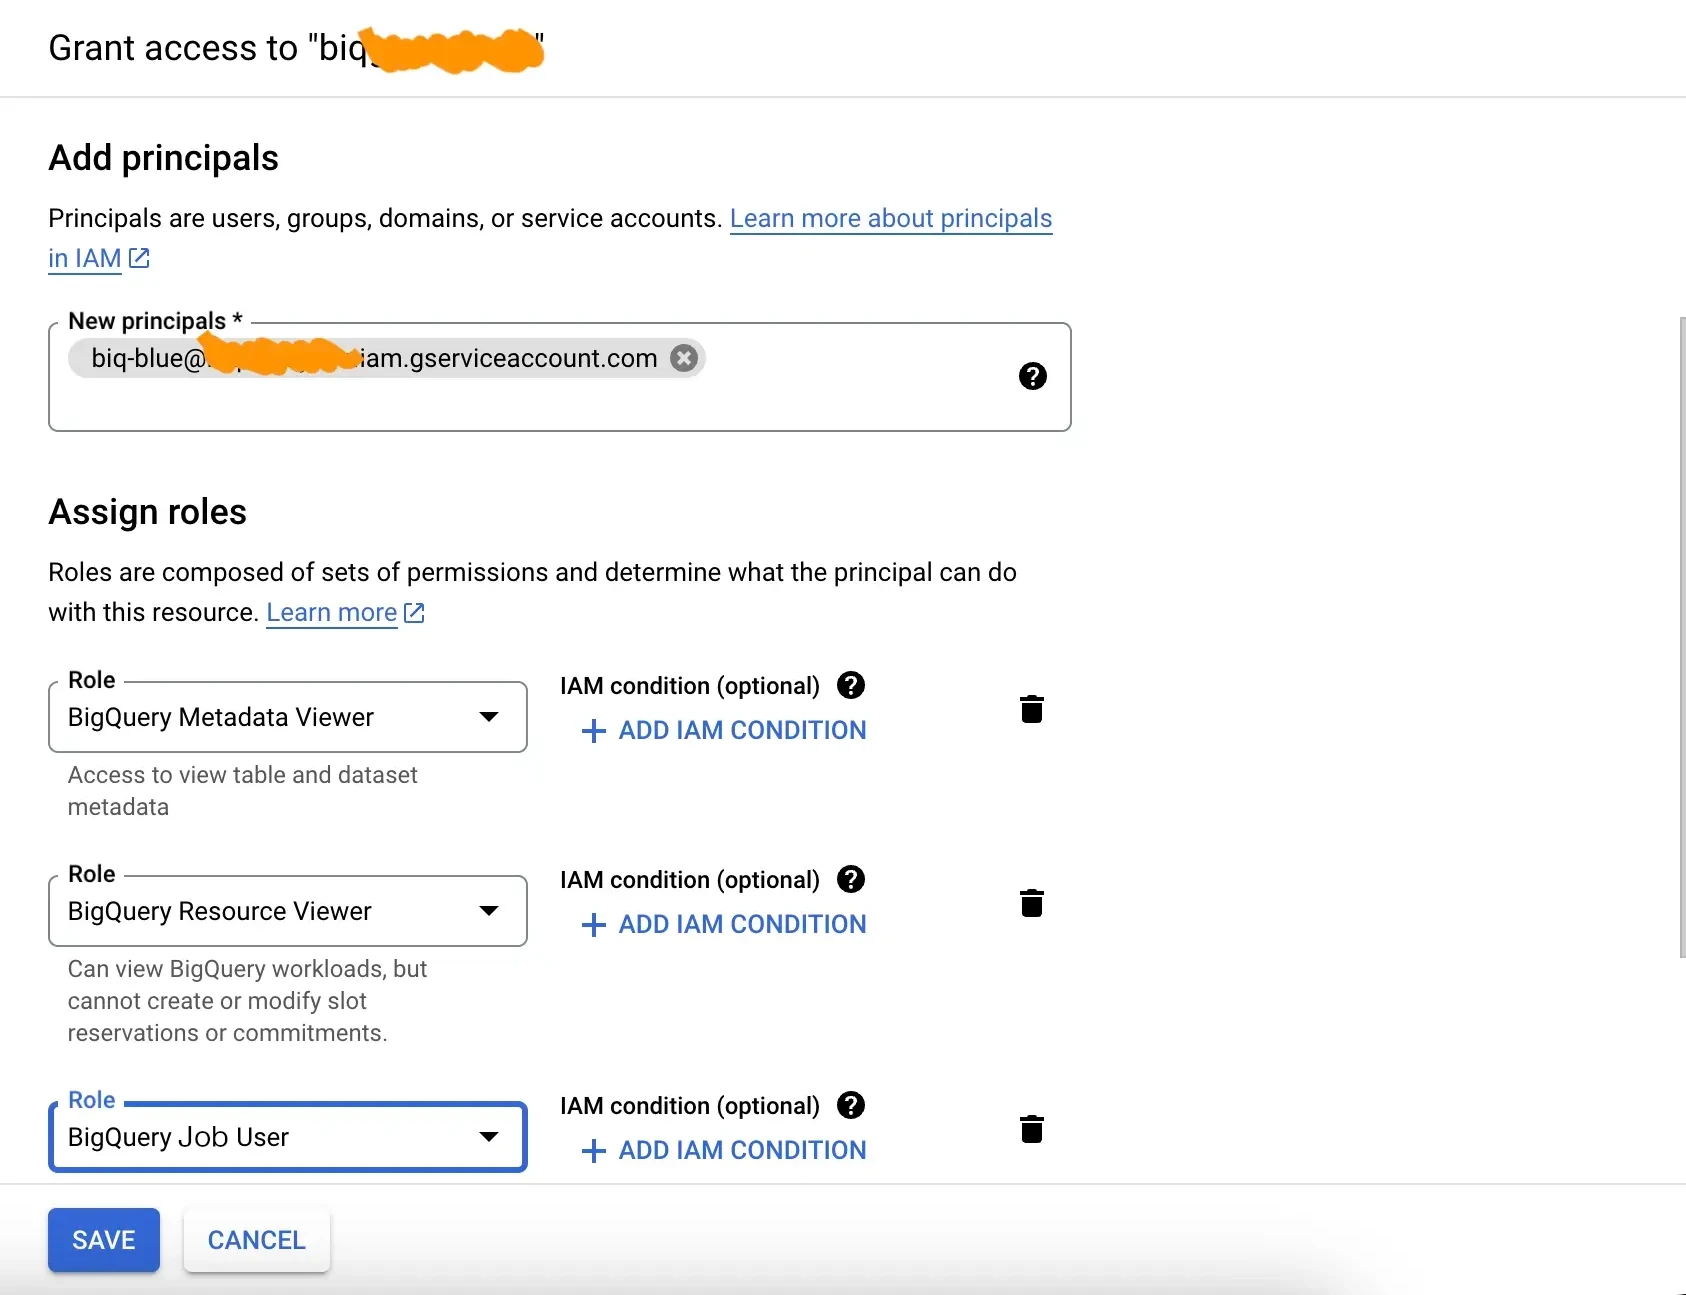
❤️ These roles ensure that Biq Blue has the necessary authorizations to analyze INFORMATION_SCHEMA views, while preventing access to your table data. Privacy first!
Step 4: Upload 🚀
Go back to setup and upload your service account here.
Final Step: Deploy 💪
Follow the final instructions and click "deploy". Access your server and start reducing Google BigQuery costs right now.
The first data synchronization can take several tens of minutes if you have a lot of projects in Google BigQuery, but you can start using Biq Blue as soon as the 1st project is synchronized.
If you need a hand, just send us an email.